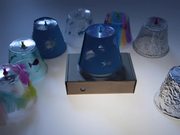
Portable Projector
Light up your tent with dazzling projections! This project was created with our limited edition Summer fun bundle. We’ve designed this bundle to keep you busy with fun, easy projects while The Heat is On! Each project uses easy-to-find household objects, so you won’t have to exert yourself while it’s Hot! Hot! Hot!
STEP 1
Gather your materials. First, find a small box. You can use any box from your pantry (granola bars, crackers, cookies, etc...). You will also need clear plastic cups and thumb tacks. Ready, go!
STEP 2
Assemble your circuit. Connect the power Bit to the battery cable and 9V battery. Be sure to switch the small black switch on your power Bit to "on". Then connect power + motion trigger + wire + bright led.
STEP 3
Place your circuit inside the box. The motion trigger should be sitting on its side and facing one side of the box. Mark where the sensor sits.
STEP 4
Cut a small circular hole on the side of the box. Put the front of the motion trigger through the hole from the inside of the box so that it just barely sticks out. Tape the Bits in place.
STEP 5
On the top of the box, cut a tiny hole in the center to feed the wire through. You can detach the JST connector from the Bitsnap in order to do this. Feed the small part of the wire through the hole and reconnect the JST connector to the Bitsnap.
STEP 6
Secure the bright led to the center of the top of the box with tape.
STEP 7
Place a clear plastic cup over the bright led. Secure this cup in place with tape or glue.
STEP 8
Take another clear plastic cup and push a pushpin down through the top of it. Place the cup with the pushpin on top of the other cup and spin it. You can rotate at whatever speed you like.
STEP 9
Now for the best part! Decorate the outer cup. You can use stickers, markers, paint, paper, and other materials to create patterns on the cup. We poked holes in tin foil and wrapped it around one of our cups. The patterns you create will generate the projection.
STEP 10
Use this projector at night when camping outside or create a picture show in your bedroom!

